A shot may look right on its own yet feel wrong in the edit: skin tones shift, the product loses its presence or an inserted screen looks pasted on. This is where VFX and colour work can make the difference. It's not about adding an effect, but about understanding what the shot needs.
Let's see it with a DaVinci Resolve session, a color comparison, and a breakdown of film effects. Afterward, you'll be able to practice with your own shots. At La Huella Studio, we start from that conversation between directing, cinematography, and post-production: what the viewer should feel and what the piece needs to achieve it.
VFX, colour correction and grading: what each one does
- VFX: they modify or integrate elements of the shot. For example, replacing the content of a screen or removing a distracting object.
- Color correction: establishes a consistent starting point for exposure, white balance and contrast, including footage from different cameras.
- Color grading: shapes the character of the image: its atmosphere, the relationship between colours and where the viewer looks. In practice, grading and corrective adjustments are reviewed together.
A practical workflow: from footage to final finish
1. Define the intended result before adjusting the controls
Choose a reference and explain why it works for you: the soft light, the separation of the product from the background, the density of the shadows? «I want this blue in the atmosphere, but to keep the skin natural» gives more information than «I want it to look cinematic.» Also agree on where the piece will be seen and keep an intact copy of the originals.
2. Check how the color is interpreted
A log image may look washed out because it needs a transformation to be viewed correctly; it does not mean it was recorded poorly. Before correcting, identify the camera profile, working space, and intended output. Log is not synonymous with RAW, nor does it guarantee a better result on its own.
The LUT Trap
A technical LUT and a creative LUT do not necessarily do the same thing. If the software already correctly transforms the camera profile, adding another log-to-Rec.709 conversion can duplicate the processing. Before looking for a look, check that interpretation: a LUT does not recover detail that was not recorded.
3. Balance the shot and compare it in sequence
Start with exposure and balance, paying attention to what matters in the framing. The waveform helps read the luminance distribution; the RGB parade helps compare the channels. These are tools to help you decide, not a command to match all signals: warm lighting can be intentional. Then compare the cuts. A gorgeous isolated shot can break the continuity of the entire scene.
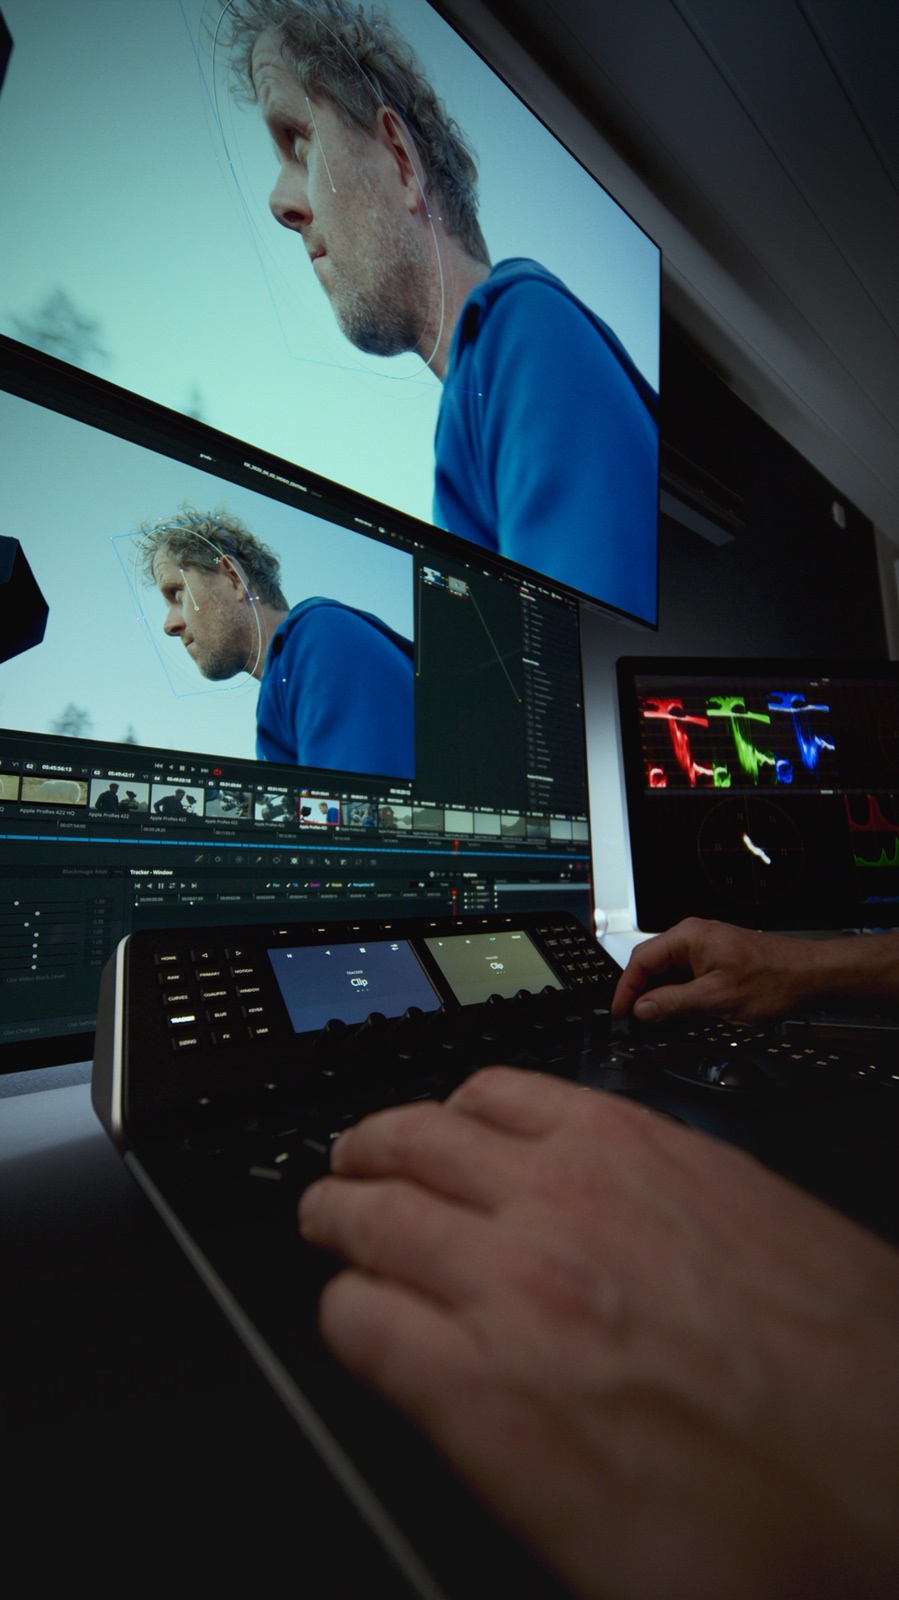
Read the image: the window isolates an area of the shot; the scopes on the right help you assess the signal. A local adjustment needs soft edges and tracking that stays with the subject as it moves. The control panel speeds up adjustments, but the decisions still depend on your eye.
Exercise · three shots, one scene
Record a wide shot, a medium shot, and a close-up of the same object. Edit together a short sequence and choose the medium shot as a reference. Adjust the other two until the object maintains a coherent presence when cutting. Check the luminosity first, then the color casts, and finally the saturation. The goal is not for the shots to be identical, but for them to appear to belong to the same moment.
4. Integrate the VFX without losing the physics of the shot
A screen replacement is a good example for learning. The new content must follow the perspective and movement of the device, respect the fingers passing in front of it, and coexist with its reflections. Afterward, blur, texture, and brightness are reviewed. Removing the green, when present, only solves part of the problem: integrating is not simply superimposing.
- Follow the movement: Verify that the corners of the content remain attached to the screen throughout the shot.
- Respect the occlusions: a hand moving across the screen must remain in front of the inserted content, without flickering edges.
- Match the surroundings: reflections, contrast and blur must match the shot, not simply the graphic being inserted.
- Watch it play, not just paused frames: Review at normal speed and then the difficult frames.
Another example is removing a cable or a sign. If you can plan for it during the shoot, capture a clean plate of the background under matching conditions. This gives the compositing team a useful reference for rebuilding the scene. You still need to check perspective, shadows and movement, but you are no longer asking post-production to recover information that was never recorded.
Watch how a shot from Blade Runner 2049 is constructed
The DNEG’s official breakdown allows you to observe the layers that build the city and their effects. This is not a demonstration of a LUT: composition, digital elements, and atmosphere come into play here, along with the cinematography and the shot's finishing.
External cinematic reference: Blade Runner 2049 · video published by DNEG. La Huella Studio did not participate in this film.
- Depth: observe how the atmosphere separates nearby buildings from distant ones.
- Light: Pay attention to the relationship between illuminated signs, fog, and surfaces. An added object must belong to the same environment.
- Continuity: follow an edge as the camera moves. Integration is judged in motion.
In advertising, this criterion also applies to a sign integrated into a facade or an extension of a set. The scale changes; the question remains whether the element truly appears to be there and helps tell the story.
5. Build the look with a reason
Think of a product against a dark background. If you increase the contrast of the entire image, you might gain impact and lose its label. Try working on the environment and the product separately, with soft selections that don't give themselves away. Compare both versions: is what you are advertising better understood, or is it just more striking? In a commercial, the finish must also protect the art, costume, and brand work.
From reference to shot: a colour comparison
In this exercise, AIRFLIX takes an image of Blade Runner 2049 as a reference and works with a stock footage shot in DaVinci Resolve. Above you see the reference; below, the demo shot and the change in treatment. A reference guides your decisions; it cannot replace the lighting on set.
AIRFLIX external exercise / RESOLVE THIS!, using Artgrid material according to its credits. It is a movie-inspired interpretation, not the original Blade Runner 2049 color grading nor a work by La Huella Studio.
Train your eye
Compare three things: the detail preserved in the dark coat, the color relationship between the sky and the road, and how much the silhouette separates from the background. Then apply that reading to a shot of your own: adjust a single variable, toggle the change on and off, and explain what it contributes. If you cannot name the improvement, review the adjustment before adding another.
In a product, the finish must preserve the material
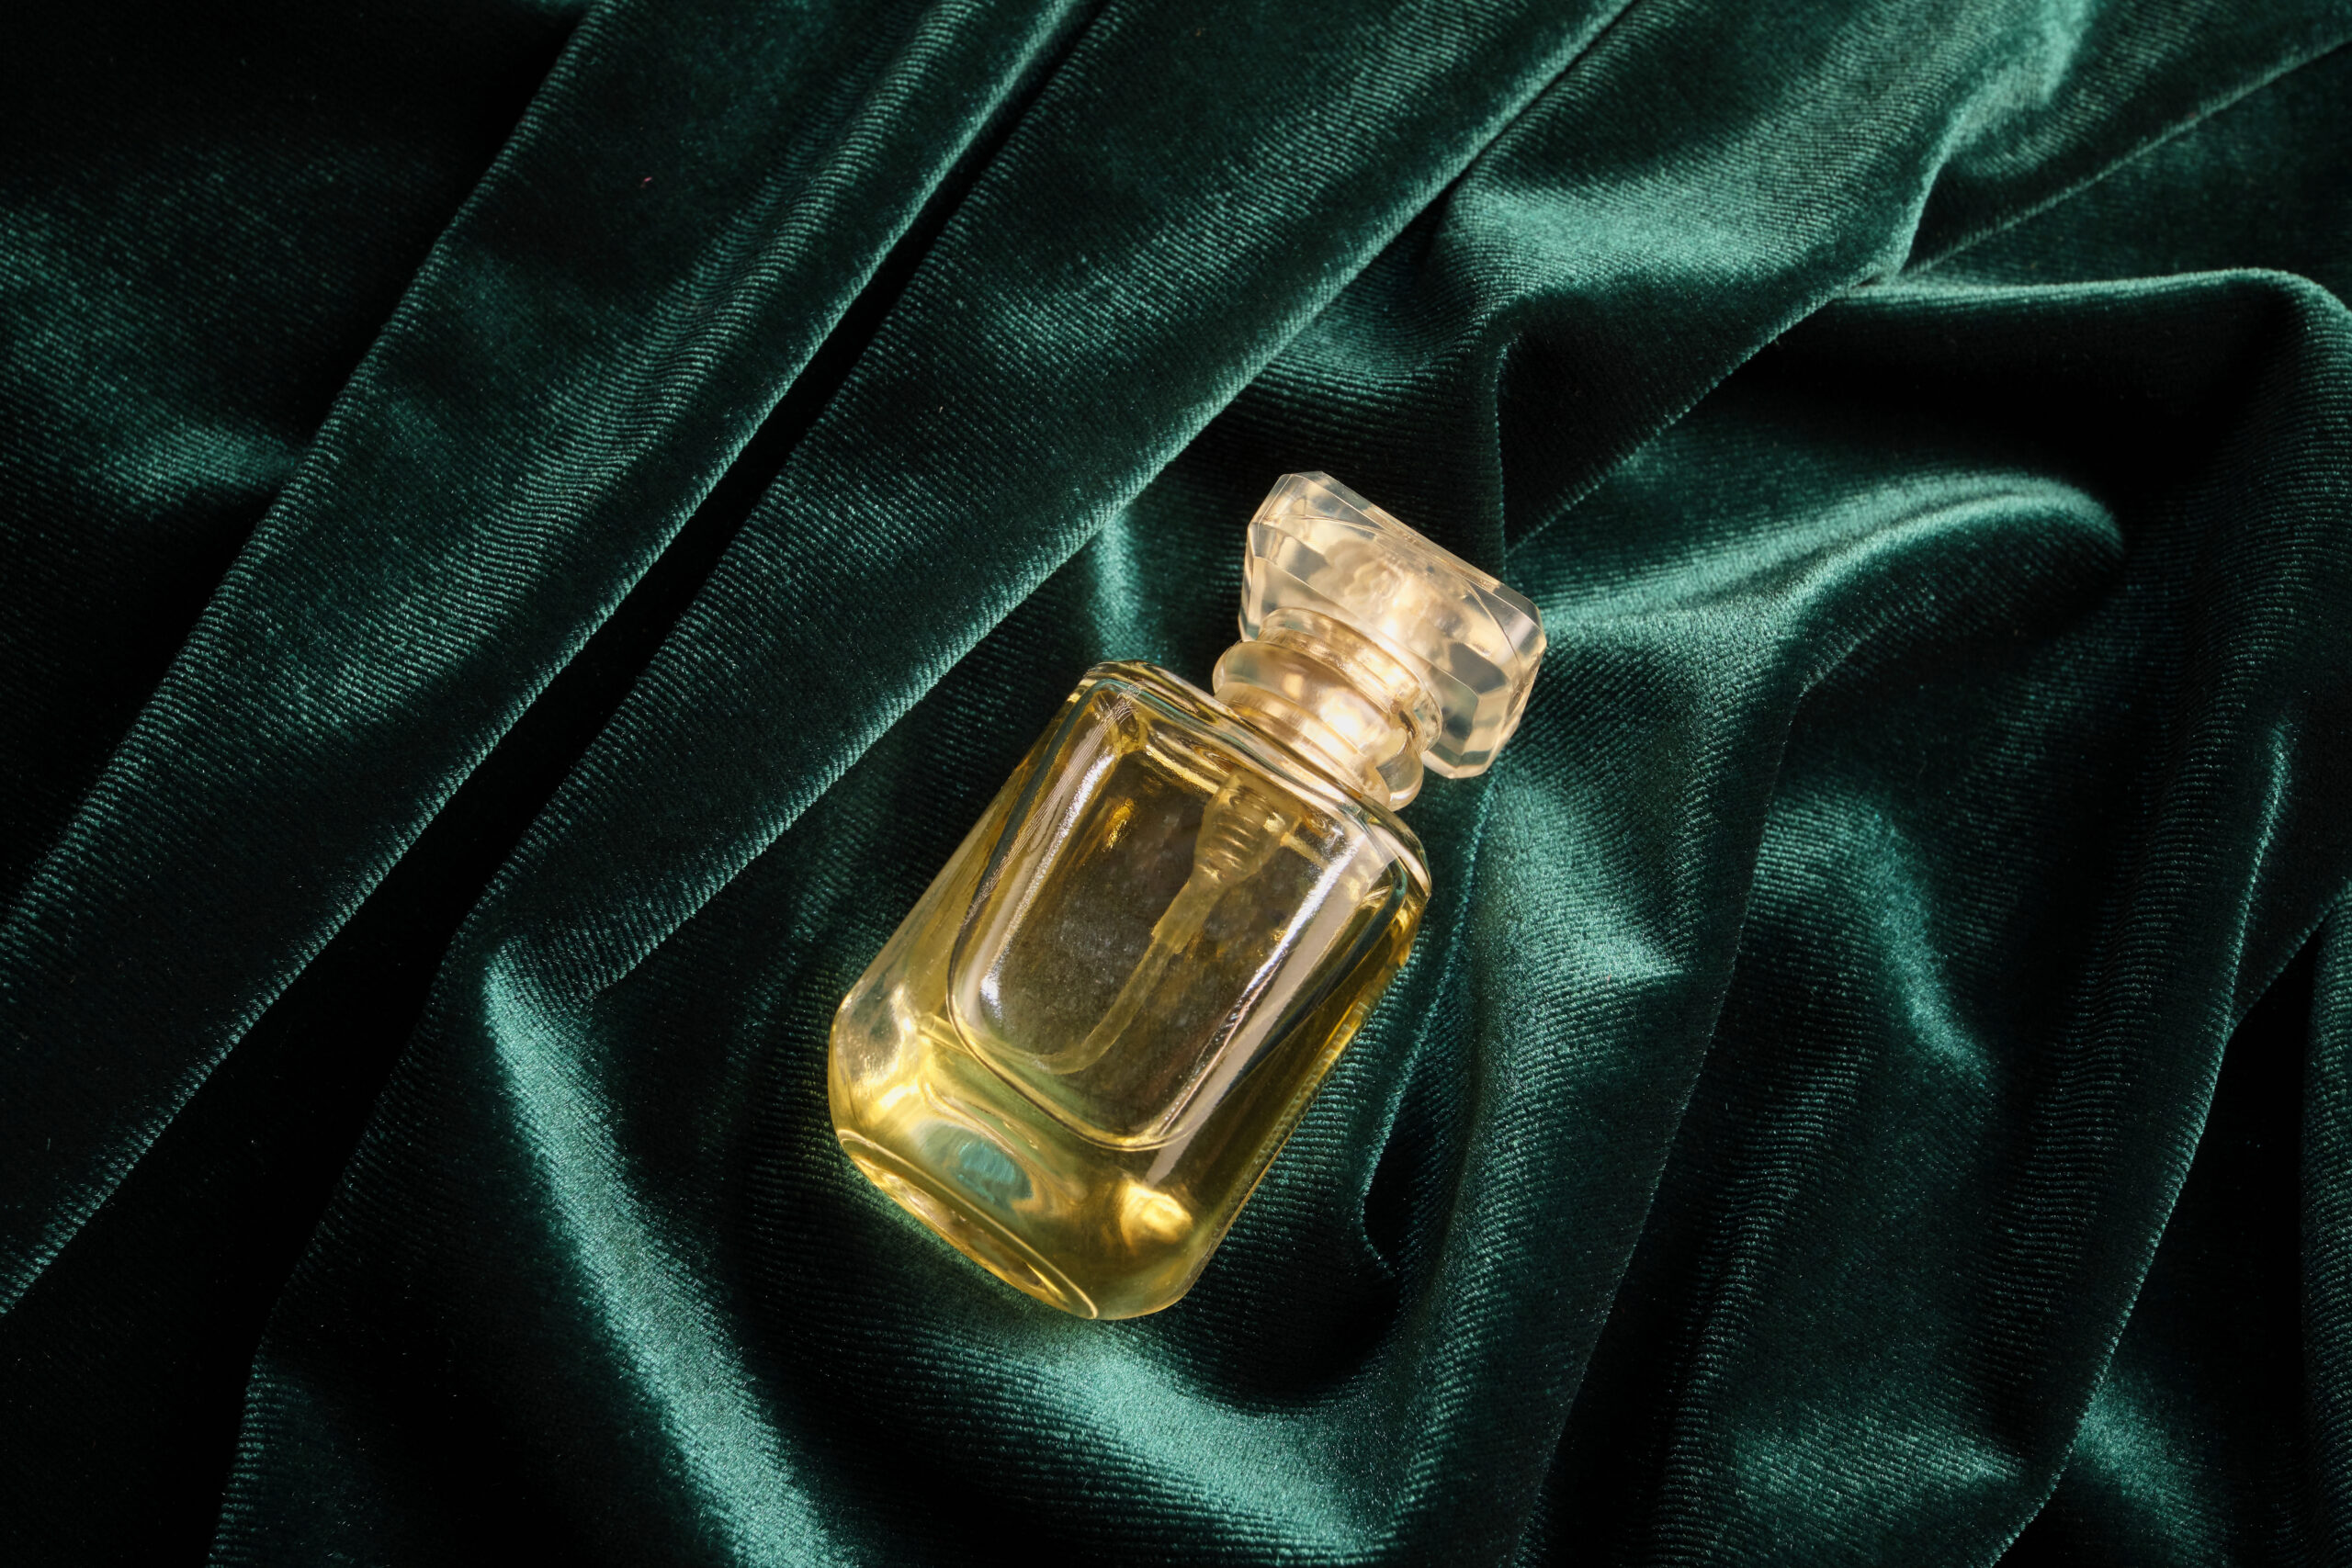
This finished photograph allows us to study another intention: maintaining the richness of crystal and velvet. Its character begins in the light and the materials, prior to color grading.
- The glass: Reflections help read the volume of the bottle. By increasing the contrast, check that its edges and light transitions remain recognizable.
- The texture: Observe how the velvet folds alternate between light and shadow. Darkening the entire background uniformly can erase that relief and flatten the composition.
- Color separation: Gold and green distinguish product and environment. Before increasing the saturation, ask if that relationship already directs the gaze to where you need it.
Try it with a photo of your own
Photograph an object on a fabric and keep the original. Make one version modifying only the contrast and another by gently adjusting the background and object separately. Compare which one best maintains volume and texture. A finished JPEG photograph allows practicing that reading, but it is not equivalent to working with the original RAW or log of a camera.
6. Check the file you will actually deliver
Export a test and reopen it. Check the edited shots, cuts, graphics, sound, and every adaptation. The master is validated against the agreed specifications and monitoring; viewing it on a mobile adds a usability check, but does not replace that control. Nor can we promise an identical appearance on all screens.
A real result: FITUR San Roque
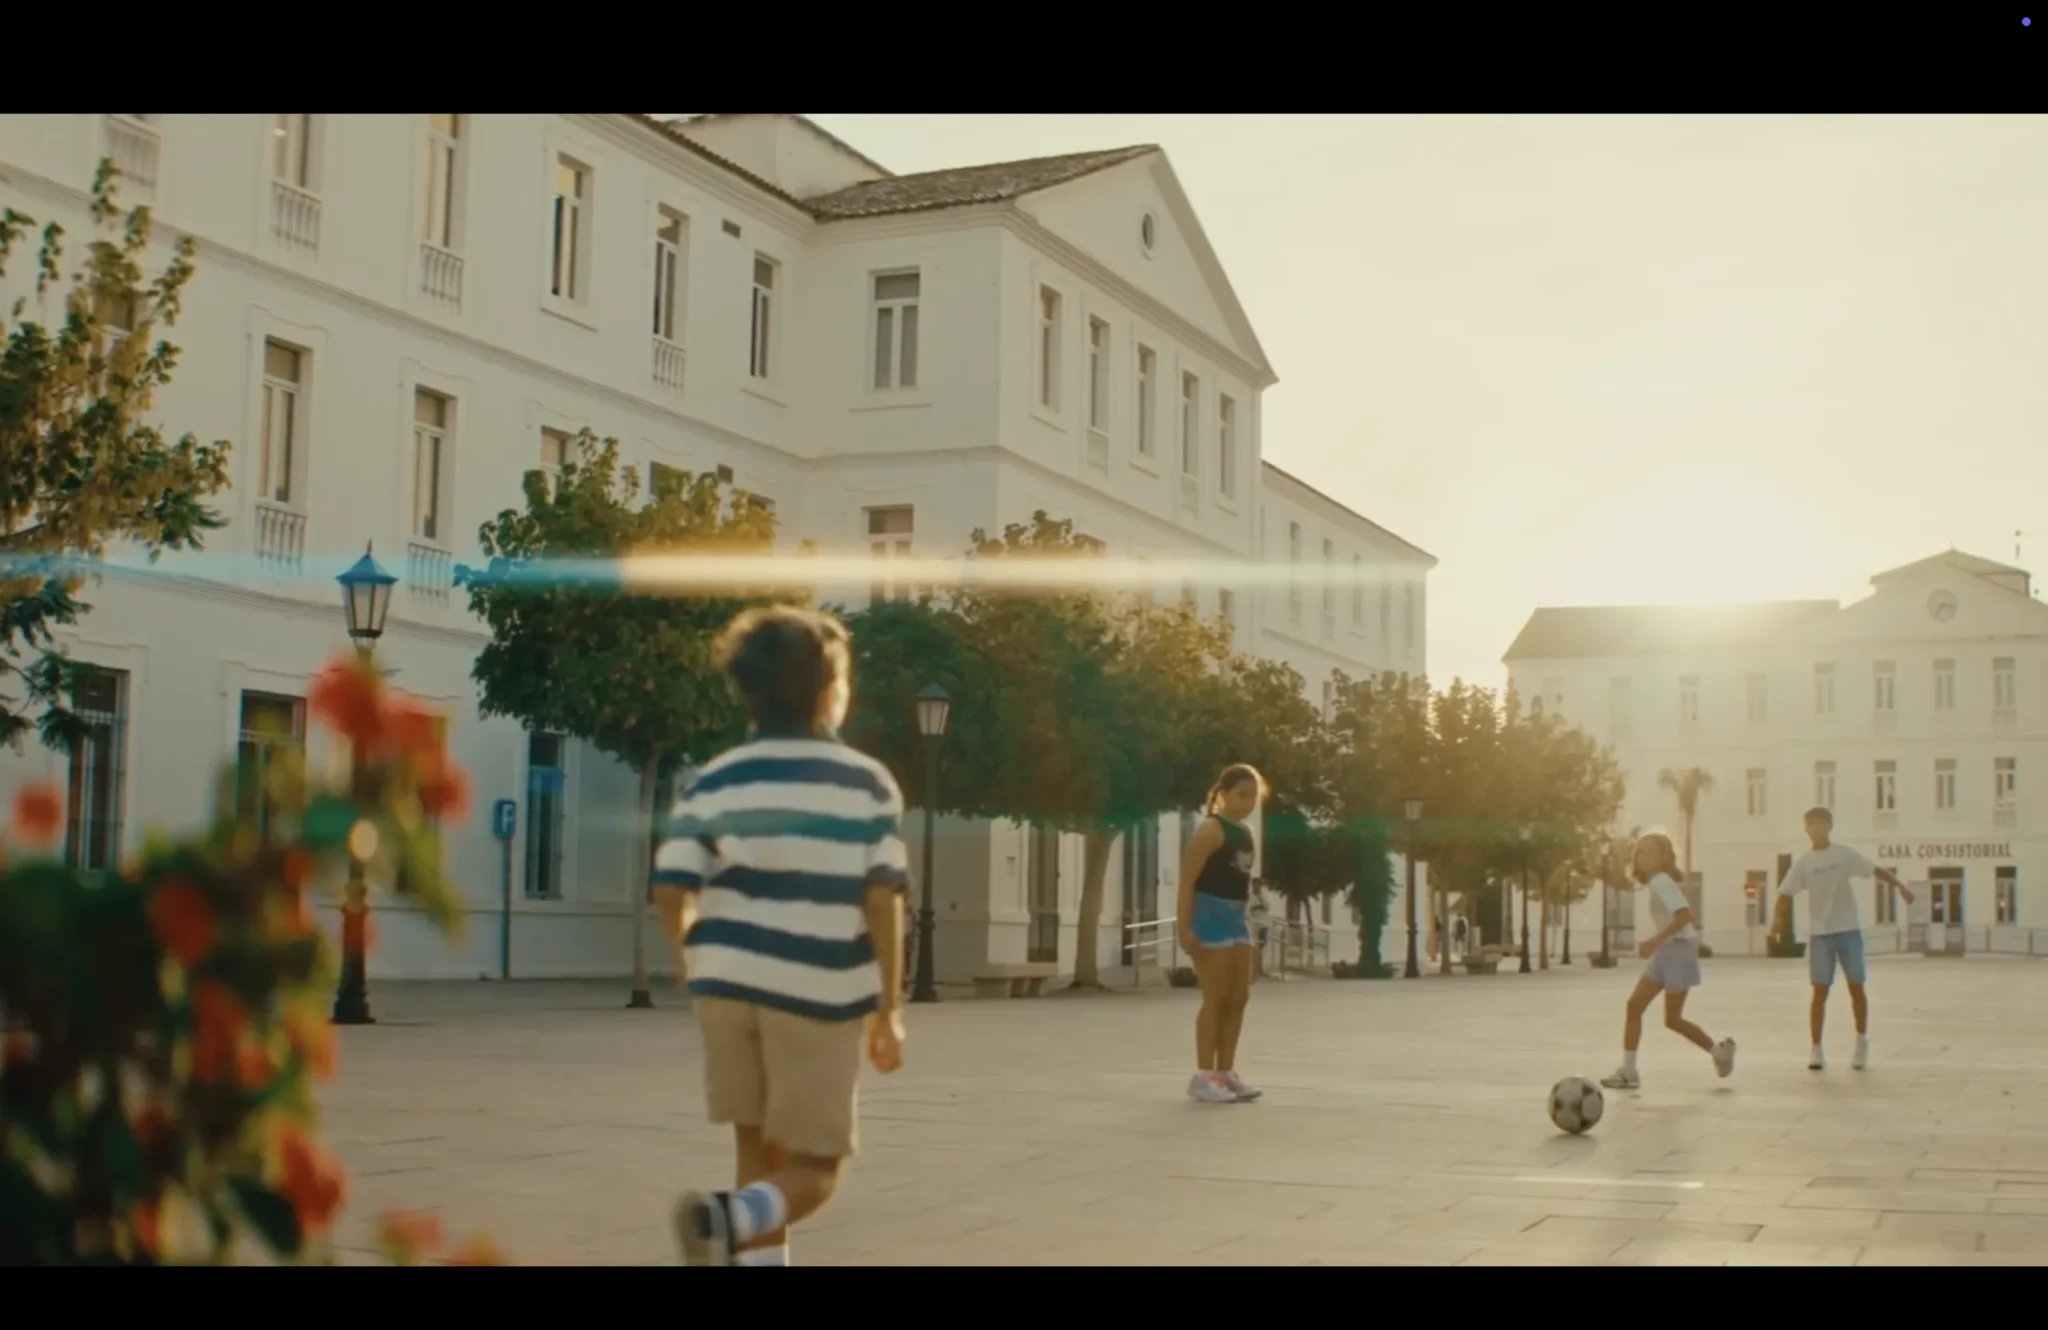
In the FITUR San Roque project page you can view the piece and check its credits. This is the final result: it allows you to appreciate its visual intent, but not to identify on its own which parts were modified in post-production.
What to prepare before submitting your project
- Clearly labelled source footage, a reference edit and a shot list with timecodes.
- Visual references and known camera profiles; specify any adjustments already applied to the edit.
- Authorized graphics, planned versions and delivery specifications.
- A person who compiles the reviews and confirms which version is being approved.
Do VFX or color grading come first?
The exchange must be agreed upon before starting: what the artists receive, what they return, and what transformation is used for review. There may be a placeholder look while working on the effects, and a final finish afterwards. The important thing is not to accidentally bake a transformation intended solely for viewing into the material.
What does the budget depend on?
It is not enough to count seconds. A static shot with simple cleanup and another with hair, transparencies, or a moving camera can require very different work. To evaluate an intervention, we review the footage, versions, complexity, and rounds of changes. Sometimes it is better to simplify the effect or solve something during the location shooting.
One visual intention, from the shoot onwards
At La Huella Studio we coordinate direction, photography, and post-production specialists according to the needs of each piece. That continuity matters just as much in a TV commercial as it does in an institutional production. Complete the “Join La Huella” form to present your work or proposal to us and tell us what you want to convey.
To keep practicing: color management in Premiere, DaVinci Resolve color tools and Cleanup of elements with Nuke. The menus and tools available depend on the version and license of each application.